
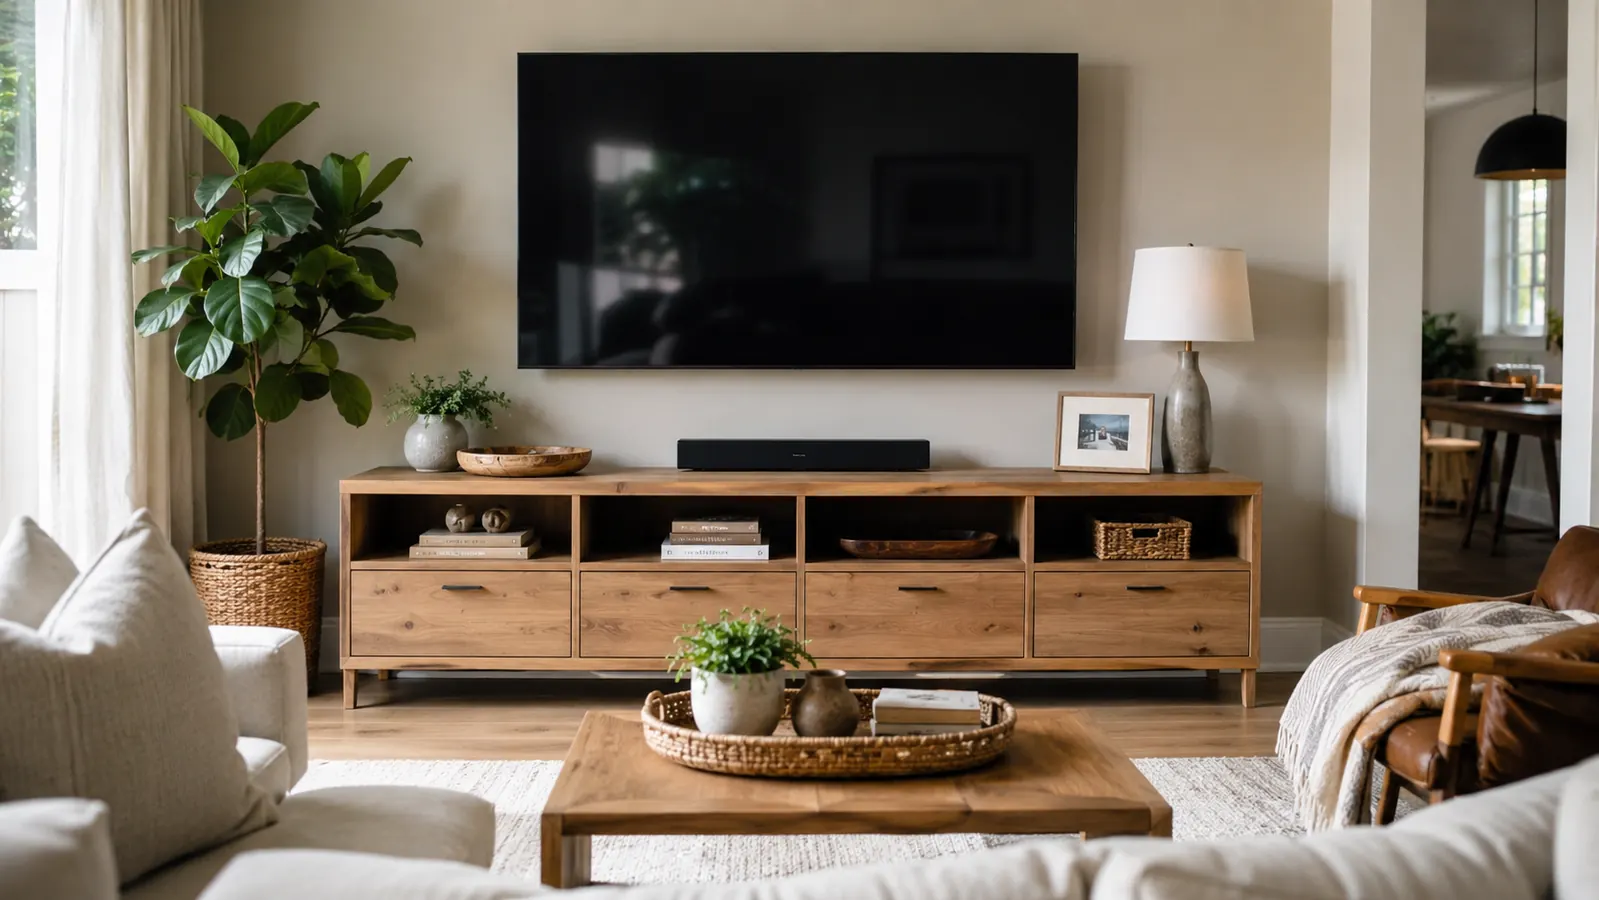
When Dave mounted our 55-inch TV above the console table three years ago, he did the wall-mount part right. What he did not plan for was everything underneath it. Our cable box, a Roku, a soundbar, and a power strip all lived on the shelf below, and the cords hung down the back of the console like something growing there. Our Lab, Biscuit, managed to unplug the whole entertainment center twice by walking behind it with his tail. I finally got tired of shoving that mess out of sight every time someone came over, and I fixed it in one Saturday afternoon with a D-Line Cable Management Box, a pair of scissors, and about ninety minutes I did not expect to need.
If your setup looks anything like ours did, a jumble of black cords, a power strip you are almost afraid to look directly at, and a dog or a toddler who finds it fascinating, this guide walks you through exactly how I hid ours for good. No electrician, no cutting into drywall, no running cords through the ceiling. Just a box, a plan, and about an hour and a half of your afternoon.
I looked at a few different fixes before settling on a box. Cord covers alone would have hidden the vertical run down the wall, but they would not have done anything about the horizontal snarl on the shelf where the power strip lived. A basket or a decorative bin would have hidden the mess from a glance, but it would not have kept Biscuit's tail out of it or kept the cords from tangling every time I moved something. A closed box that actually contains the power strip and routes the cords through two clean holes was the only option that solved the whole problem instead of half of it.
Before we get into the steps, here is the box that made this whole project possible in one afternoon.
The D-Line Cable Management Box holds a full power strip and a bundle of cords behind one closed lid, with cord holes cut into both ends so everything routes cleanly. It has over 13,900 reviews and a 4.5-star rating on Amazon, and it is the exact box I used behind our own TV stand.
Amazon Check Today's Price on Amazon →Step 1: Take Stock of What You Are Actually Hiding
Before you buy anything or move a single cord, sit down on the floor behind your TV stand and actually look at what you are dealing with. In our case that meant a cable box, a Roku, a soundbar, a TV power cord, and a phone charger someone had plugged in and forgotten about. Count your devices and count your cords. This matters because cable management boxes come in different sizes, and the D-Line box I used comfortably fits a standard power strip plus the cord bundle from four to six devices. If you have a much bigger media setup, a gaming console and two streaming boxes and a modem, you may want the larger version or a second box for the modem separately.
While you are back there, also check how far your outlet is from where the devices sit. Our outlet was about eighteen inches to the left of the console, which meant the power strip needed to travel that whole distance before disappearing into the box. Measure that distance now so you are not surprised later. I used a regular tape measure and jotted the number on a sticky note, which felt a little silly until it saved me a second trip to the hardware aisle.
It is also worth glancing at your wall or console finish while you are down there. The D-Line box comes in a plain off-white that blends into most trim and baseboards, but if your console is a dark wood or your carpet is a bold color, you may want to tuck the box slightly further back or behind a furniture leg so it is not the one obviously new object in the room. Ours sits against a cream baseboard, so it disappears without any extra effort on my part.
Step 2: Unplug Everything and Bundle the Cords
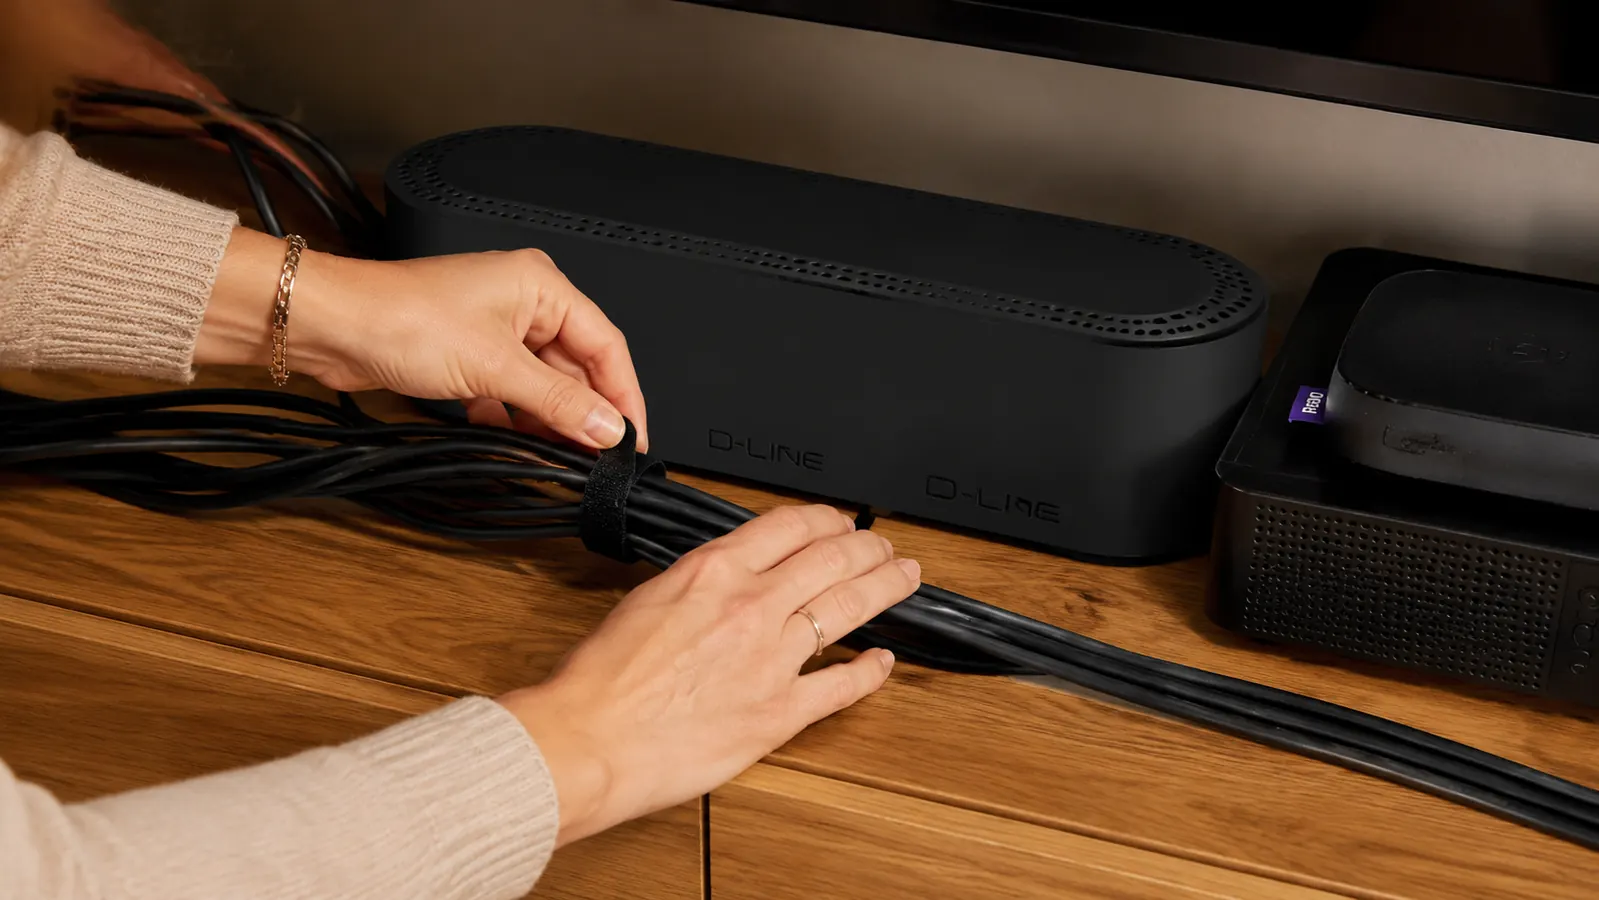
This is the step people skip, and it is the reason so many cord projects end up half-finished. You cannot cleanly route a mess of individual cords. You need one bundle. Unplug every device from the wall and from the power strip, then lay the cords out flat on the floor so you can see the full length of each one. I labeled ours with painter's tape and a marker, TV, cable, Roku, soundbar, because I knew myself well enough to know I would forget which plug went where an hour later.
Once everything is unplugged, group the cords together and secure them with Velcro cable ties every eight to ten inches along the length. I used the reusable Velcro straps rather than zip ties, since zip ties are permanent and I wanted the option to add a device later without cutting anything off. Gather the bundle so it lies as flat as possible. A rounder, thicker bundle is harder to feed through the cord holes in Step 3, so take an extra minute here to keep it tidy.
Before you move on, take thirty seconds to double-check every device is actually unplugged, not just powered off. I got a small static shock reaching behind the soundbar once because I assumed the power button meant the cord was safe to handle. It is a small thing, but working with a fully unplugged setup makes the rest of this project a lot less nerve-wracking, especially if you have kids underfoot wanting to help.
Step 3: Feed the Bundle and Power Strip Into the Box
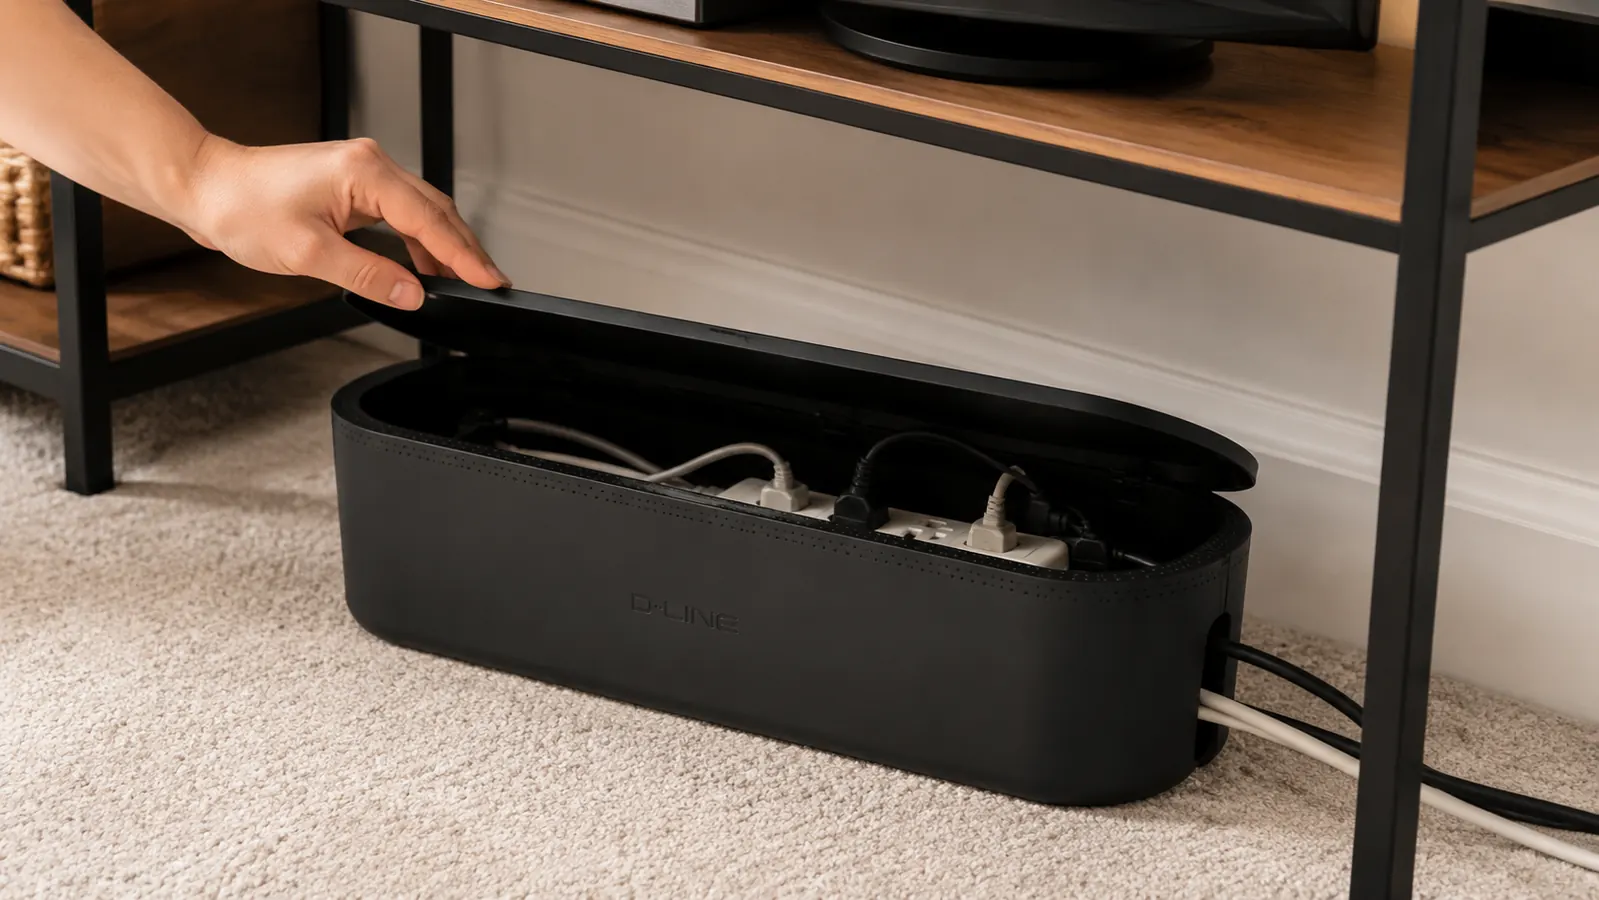
Open the lid of the cable management box and set your power strip inside it first. The D-Line box has cutouts on both short ends, one for the cord bundle coming from your devices, and one for the power strip's own cord that runs to the wall outlet. Feed the wall-outlet end of the power strip cord out through the closer cutout, and set the strip flat inside the base of the box.
Next, feed your bundled device cords through the other cutout and plug each one into the power strip inside the box. Do this one at a time rather than trying to shove the whole bundle through and plug in later, it is much easier to keep track of which plug is which while you can still read your painter's tape labels. Once every device is plugged in and tucked inside, close the lid. It should sit flush without you having to force it, and if it does not, you likely have too much slack cord bunched up inside rather than routed back out through the openings.
If your power strip has a surge protector built in, this is a good moment to note where the reset button sits before you close the lid for good. Ours trips maybe once a year during a storm, and I would rather know exactly where that button is than have to fish the whole bundle back out of the box in the dark to find it.
Plug the power strip's cord into your wall outlet, then plug the loose ends of your device bundle back into the actual TV, cable box, Roku, and soundbar. This is the moment where the whole shelf goes from a rat's nest to a single manageable bundle running from a closed box, and it is genuinely satisfying the first time you see it.
Step 4: Position the Box Behind the Stand or Mount It to the Wall
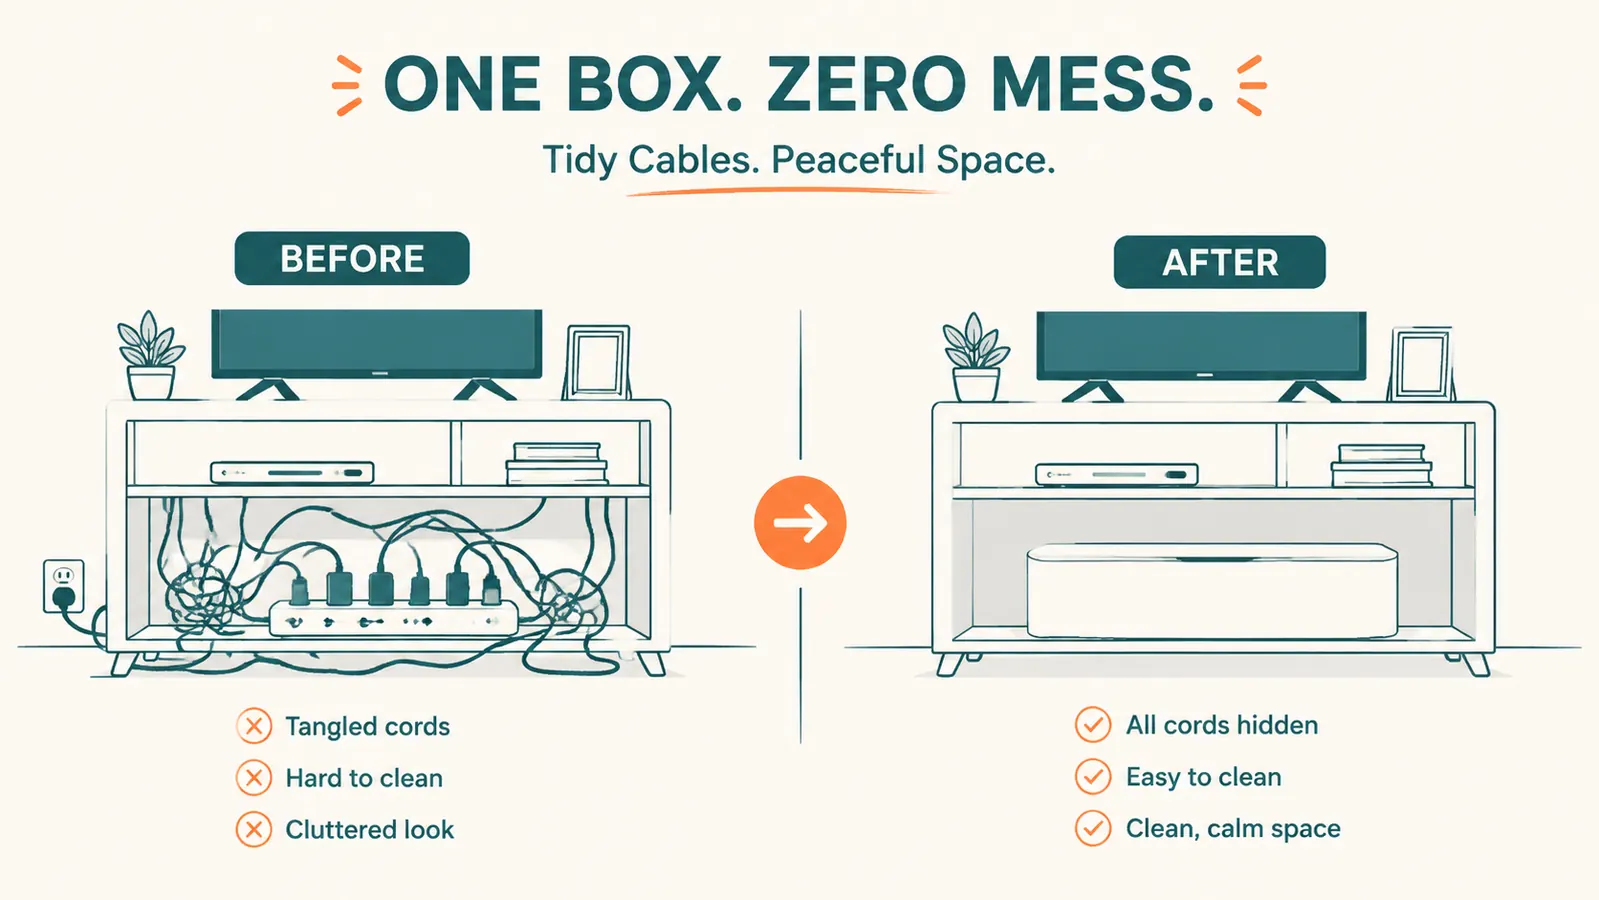
Most people, us included, simply slide the closed box back behind the TV stand where it is out of sight from the couch. If your console sits flush against the wall, this alone solves the visual clutter completely. Set the box on the floor directly below where your cords descend from the devices, so there is no long stretch of exposed cord between the shelf and the box.
If you would rather mount the box off the floor, the D-Line box also comes with mounting hardware so you can screw it directly to the wall behind the console. We chose the floor placement because our console sits low enough that nothing is visible from a seated position, but if you have pets or small kids who get back there, wall-mounting keeps the box, and the temptation to open it, further out of reach. Either way, you are not drilling into the console furniture itself, just the wall or the floor, so it works with rented furniture or a stand you are not ready to modify.
If you are mounting to drywall and there is no stud where you need one, use a small plastic drywall anchor rather than driving the screw straight into open wall. The box itself is light once it is emptied of cords, so it does not need heavy-duty hardware, but an anchor keeps it from working loose over time the way a bare screw in drywall eventually will.

Step 5: Dress the Remaining Slack and Do a Final Check
Once the box is in place, stand back up and look at the shelf from where you actually sit to watch TV. Any cord still visible between the devices and the box is your remaining project. For us, that was about a foot of TV power cord that ran along the back edge of the shelf before dropping down to the box. I used self-adhesive cord clips along the underside of the shelf to keep that last stretch pinned flat instead of hanging loose.
Turn everything back on and confirm each device actually works before you walk away and call it done. I learned this the hard way on a different project when I proudly finished a cord cleanup only to discover the soundbar had come unplugged during the shuffle and nobody noticed until movie night. Two minutes of testing now saves you from crawling back there after dinner guests have already arrived.
I do a quick check behind the console every few months when I am vacuuming that side of the room, mostly just to wipe dust off the top of the box and make sure nothing has worked loose. It takes under a minute and the whole setup has stayed exactly as tidy as the day I built it, going on three years now.
The first night after I finished, Dave walked in, looked at the console, and asked where all the cords went. That was the whole point. Nobody should notice the cord management. They should just notice there is nothing to notice.
What Else Helps
A cable management box handles the cluster of cords at the source, but a few small additions round out the project. If your TV is wall-mounted with cords running down the wall to the console below, a slim self-adhesive cord cover in a color matched to your wall paint hides that vertical run without an electrician fishing anything through the drywall. I used a three-foot cover behind our TV and it has been invisible from day one. For the last few inches of cord near an outlet that sits in open view, a small outlet cover or a piece of furniture positioned to block the sightline finishes the look without another purchase.
If you add a new streaming device down the road, resist the urge to just drape the new cord over everything else. Pop the lid on the cable box, feed the new cord through the same cutout as the others, and plug it into an open outlet on the power strip. It takes ninety seconds and keeps the whole system as clean as the day you built it. I have added two devices to ours since the original setup and it still looks exactly like it did that first Saturday.
Once the TV console is squared away, the same approach works anywhere else cords pile up in the house. I did the same thing behind my desk in the office and under the kitchen counter where the coffee maker, the toaster oven, and a phone charger all share one outlet strip. Same idea, smaller box, same one afternoon fix.
Ready to stop shoving cords behind the couch every time someone visits? This is the box I actually used.
The D-Line Cable Management Box fits a full power strip plus a bundle of device cords behind one closed lid, comes in a finish that blends into most rooms, and has more than 13,900 reviews backing it up. It solved this exact problem in one afternoon at our house.
Amazon Check Today's Price on Amazon →